A.
This guide explains how to use the popup keypad feature in TOP Design Studio.
1. Creating a Popup Keypad
When a new project is created in TOP Design Studio, two default keypad windows are automatically generated:
-. 65534 - Keyboard: Alphanumeric keypad
-. 65535 - Tenkey: Numeric keypad
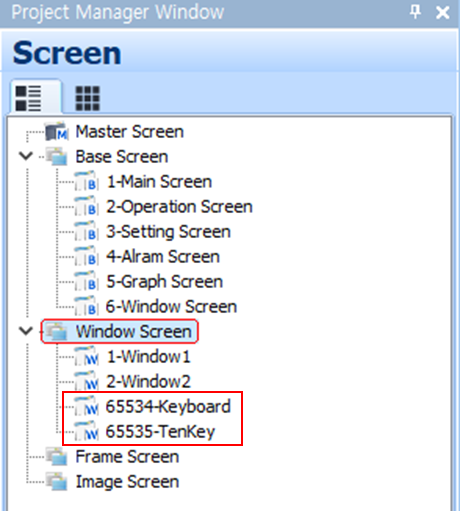
Default Keypad Types:
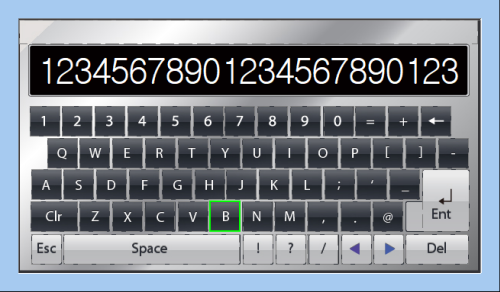
-. 65534 - Keyboard is used for text input and appears as shown below.
-. 65534 - Keyboard is used for text input and appears as shown below.
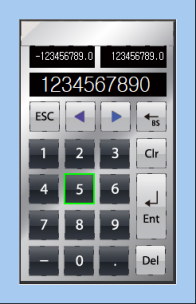
-. 65535 - Tenkey is the default numeric keypad, as shown below.
If these windows are accidentally deleted or corrupted, they can be easily re-added:
-. In the Project Manager, right-click on [Window Screen].
-. Select [Add Default Tenkey] to add the numeric keypad (65535-Tenkey).
-. Select [Add String Tenkey] to add the alphanumeric keypad (65534-Keyboard).
-. Select [Add Default Tenkey] to add the numeric keypad (65535-Tenkey).
-. Select [Add String Tenkey] to add the alphanumeric keypad (65534-Keyboard).
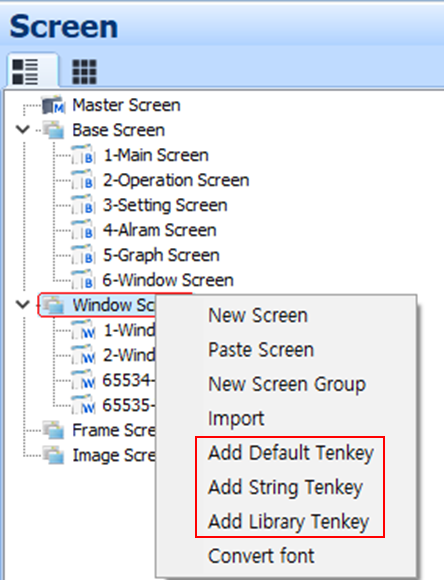
Adding Custom Keypads:
If you want to use a different keypad design, select [Add Library Tenkey] from the same menu.
If you want to use a different keypad design, select [Add Library Tenkey] from the same menu.
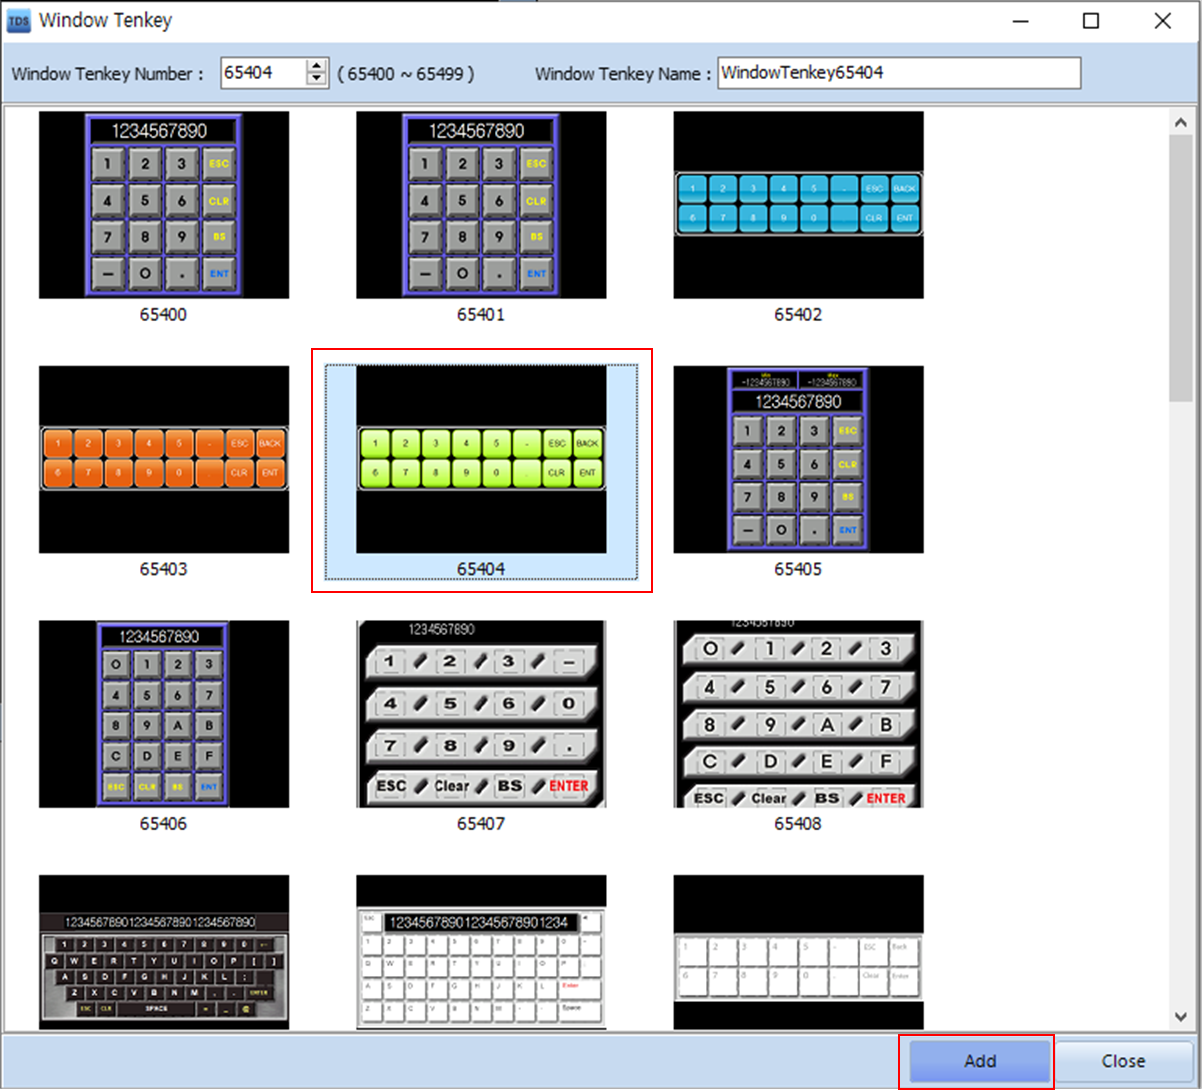
Choose a keypad from the available list, and click [Add]. The keypad will be created as a new window with the assigned number.
※ Note: Library keypad designs are continuously updated.
For Korean input, the default system-provided keypad is used by the TOP device, and users can customize it as needed.
For Korean input, the default system-provided keypad is used by the TOP device, and users can customize it as needed.
2. Using the Popup Keypad
Popup keypads can be used with both Numeric Keypad objects and String Keypad objects.
For Numeric Keypad Objects:
1) Open the object property.
2) Go to the [Input] tab.
3) Set [Virtual Keyboard] to [POP-UP].
4) Click the [Select] button next to [Window Number] and choose the keypad window you wish to use.
1) Open the object property.
2) Go to the [Input] tab.
3) Set [Virtual Keyboard] to [POP-UP].
4) Click the [Select] button next to [Window Number] and choose the keypad window you wish to use.
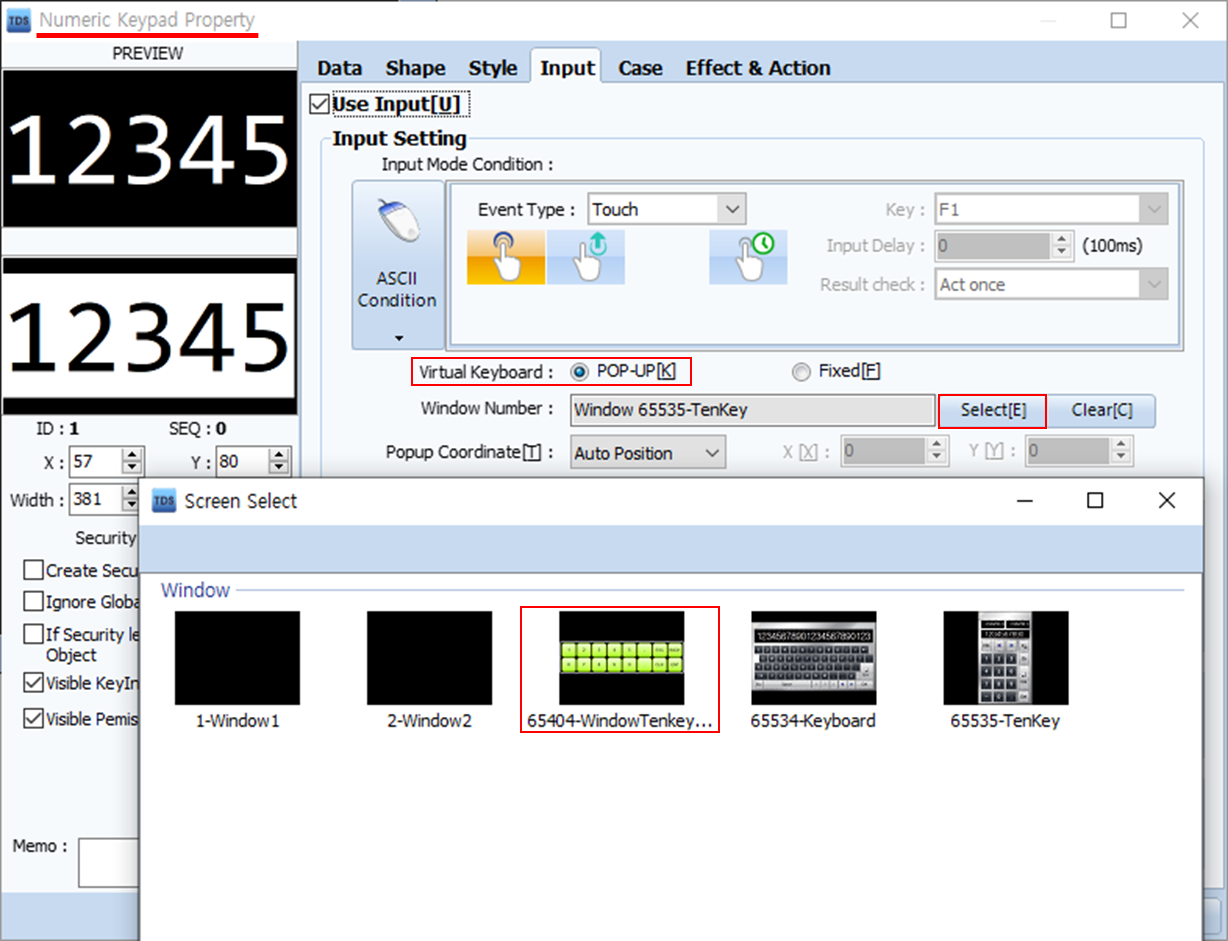
Popup vs. Fixed Keypad:
-. Popup Type: The keypad appears only when data entry is needed. This is ideal for screens with limited space.
-. Fixed Type: The keypad remains visible on the screen at all times. This may be preferred when screen space is sufficient or when popup behavior is not desired.
To use a fixed keypad:
1) Add the desired keypad screen using [Add Library Tenkey].
2) Copy the keypad from the newly added window.
3) Paste it directly into the Base Screen where it should always be displayed.
1) Add the desired keypad screen using [Add Library Tenkey].
2) Copy the keypad from the newly added window.
3) Paste it directly into the Base Screen where it should always be displayed.