A.
This guide explains how to synchronize time between the TOP HMI and the PLC.
There are two ways to synchronize time:
1. Set the PLC time to the TOP.
2. Set the TOP time to the PLC.
1. Set the PLC time to the TOP.
2. Set the TOP time to the PLC.
You can check and set the current time of the TOP from the bottom of the menu screen.
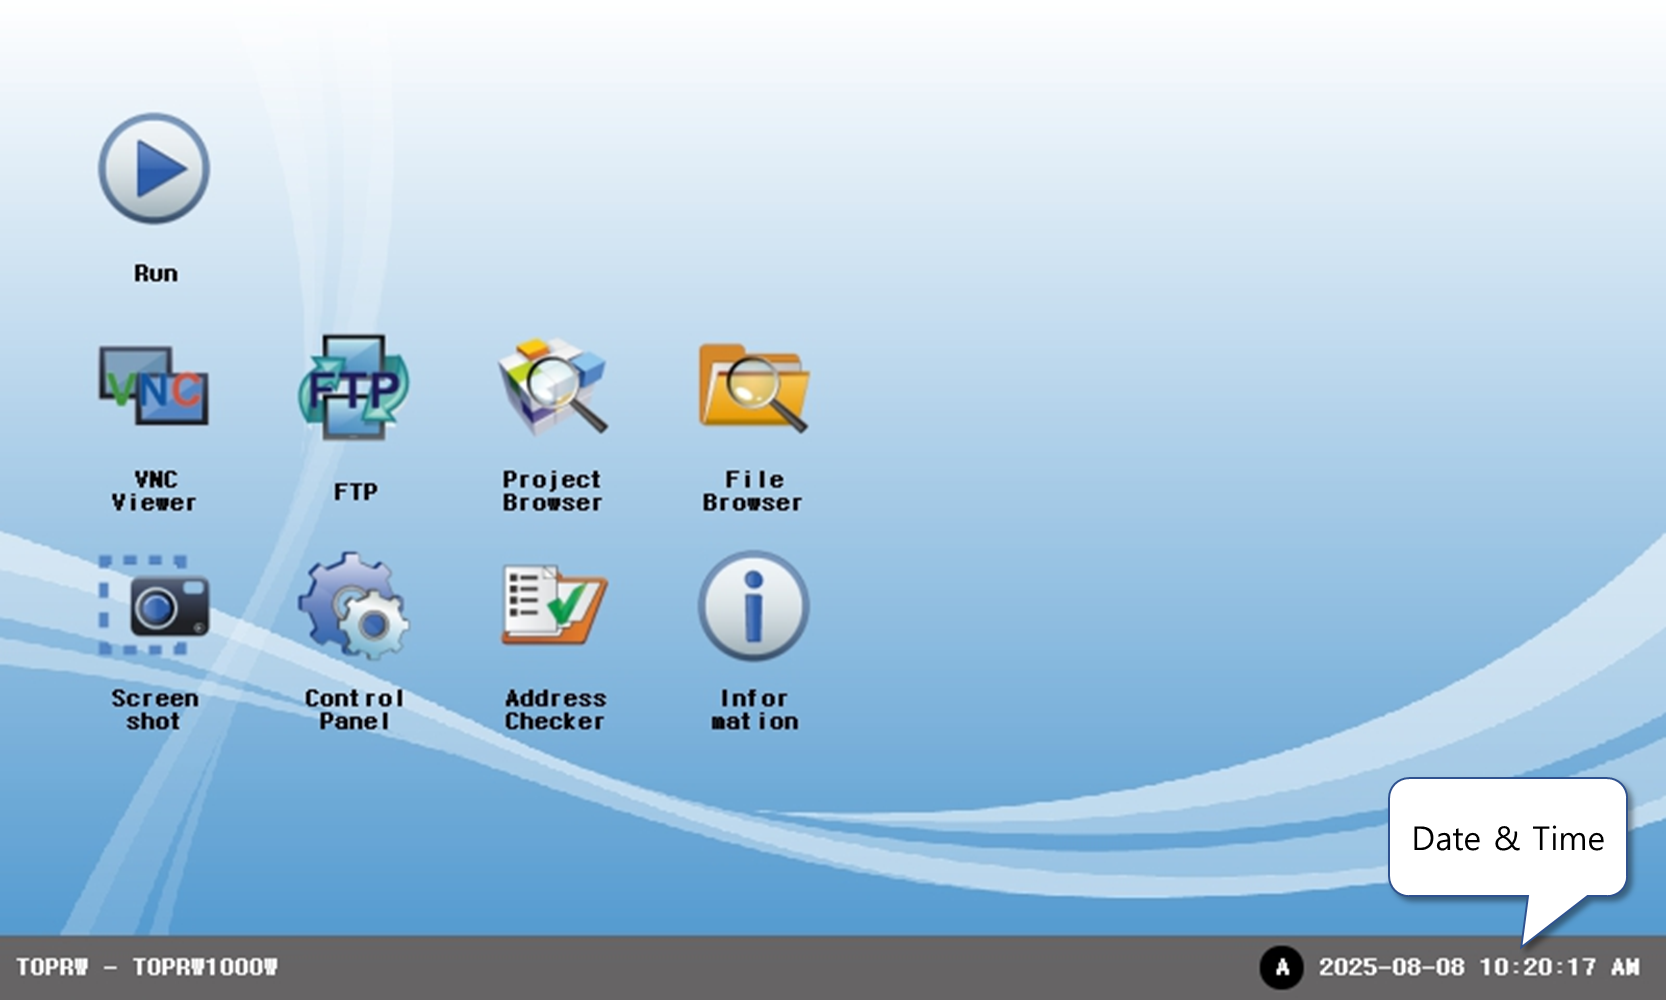
The time is stored in the internal special address of the TOP in the format of year, month, day, hour, minute, and second.
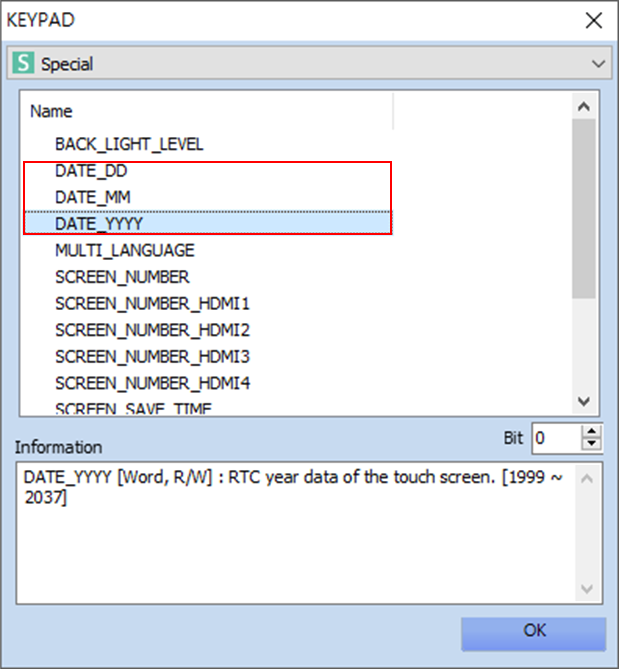
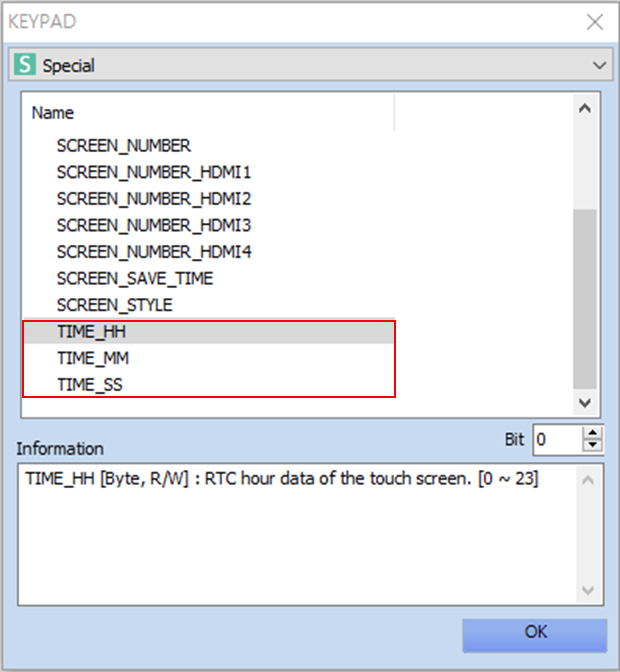
1. Synchronizing TOP Time Based on PLC Time
To set the TOP time using the PLC time:
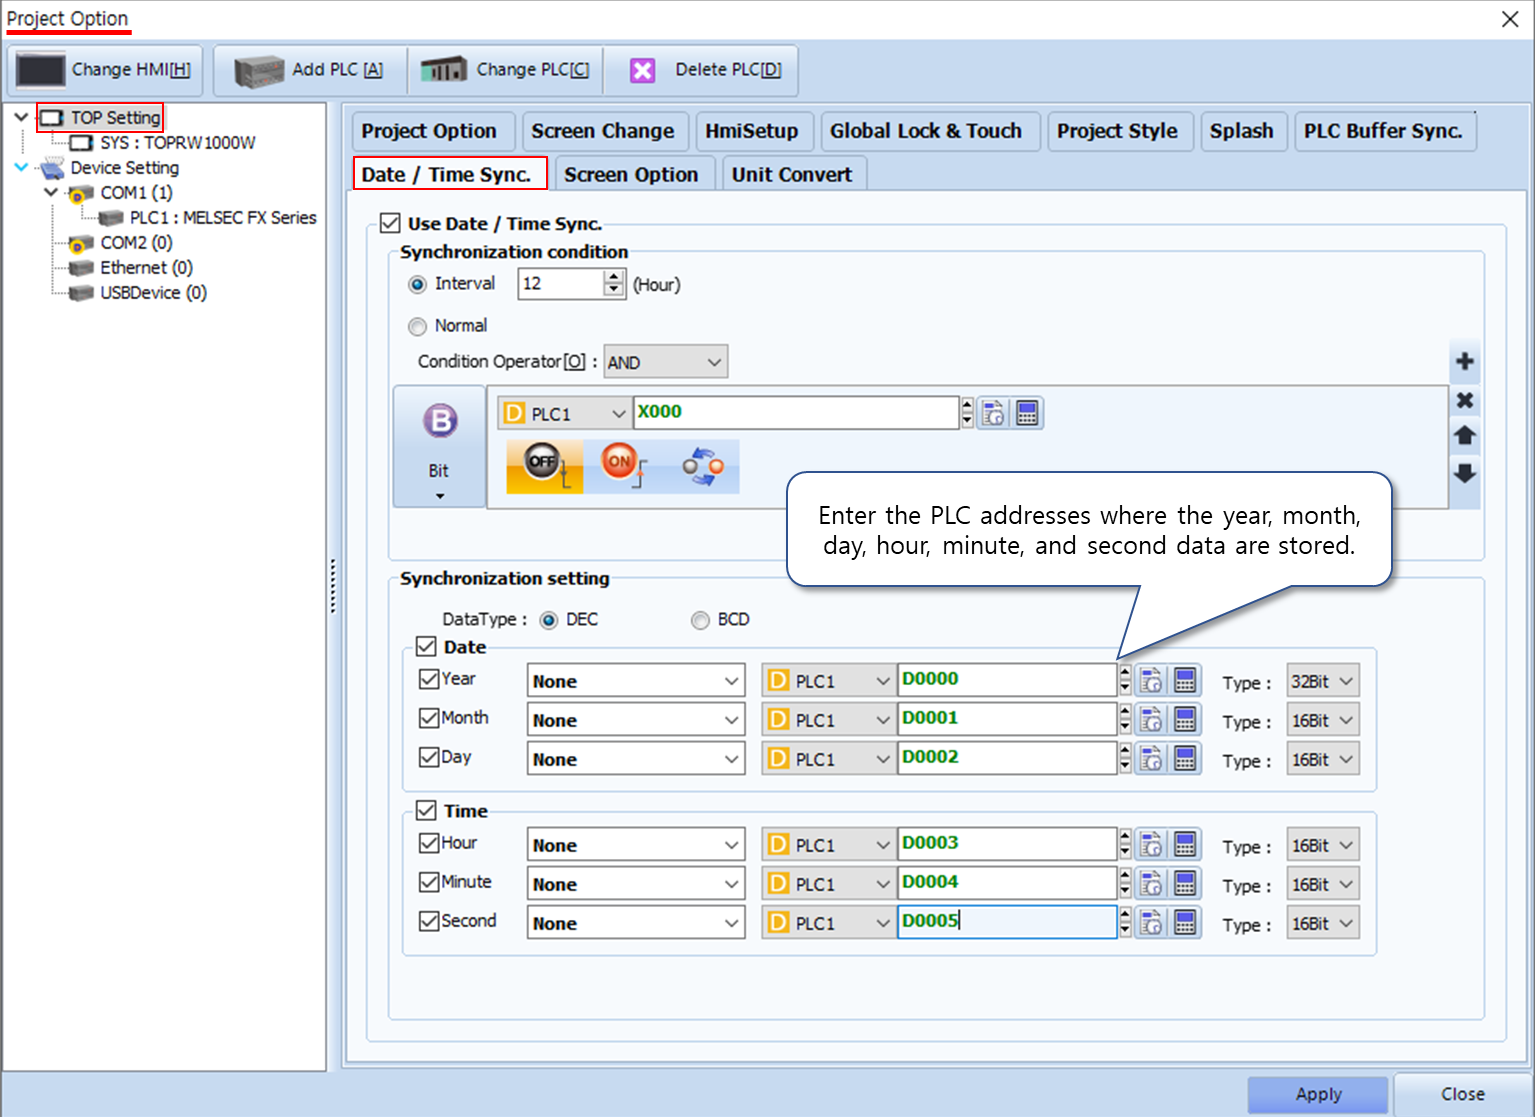
1) In TOP Design Studio, go to [Project] - [Property] menu on the top.
2) In the [Project Option] window, select [TOP Setting] on the left list.
3) Open the [Date/Time Sync.] tab on the right side.
4) Check [Use Date/Time Sync.], then configure the [Synchronization condition] and the [Synchronization setting].
-. [Synchronization condition] : Synchronization is performed when the specified condition is met. (e.g., If set as shown below, the sync runs every 12 hours.)
-. [Synchronization setting] : Enter the PLC addresses that store the time (year, month, day, hour, minute, second) in the corresponding fields.
2. Synchronizing PLC Time Based on TOP Time
To set the PLC time using the TOP time:
-. The date and time (year, month, day, hour, minute, second) stored in the TOP’s special address must be written to the PLC time address.
-. This is done using a Global Script in TOP Design Studio.
-. Global Script run continuously regardless of the currently displayed screen, as long as the specified condition is met.
-. As shown below, set the script condition to run at 9:00 and 21:00 (9:00 PM), ensuring synchronization occurs every 12 hours.
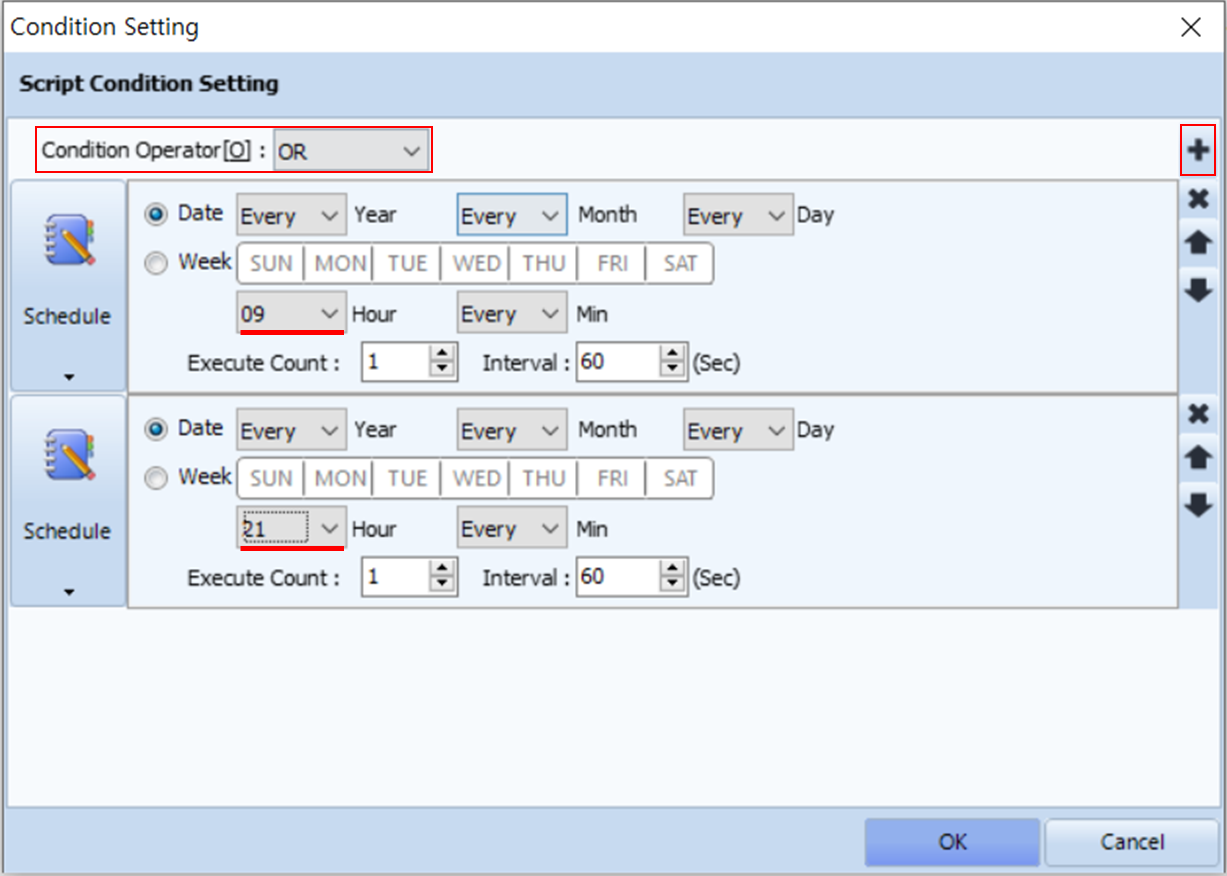
-. The script content should copy the values from the TOP’s special time addresses to the corresponding PLC time addresses.

※ Note
-. The TOPR/RX/RW/RE/RH series includes a built-in soldered battery on the main board.
-. This battery is used only for the internal clock.
-. If the battery fails, the time resets to 2000-01-01 on the menu screen.
-. In such cases, please contact our customer support center for service.