A.
The procedure for transferring a project file is the same for all TOP series models: TOPR, TOPRX, TOPRW, TOPRE, and TOPRH.
1. Install TOP Design Studio
Download TOP Design Studio from the website under [Service] - [Download] - [Software], and install it on your PC.
Download TOP Design Studio from the website under [Service] - [Download] - [Software], and install it on your PC.
2. Open the Project File
Launch TOP Design Studio and open the project file with a .TDS extension via [File] - [Open].
Launch TOP Design Studio and open the project file with a .TDS extension via [File] - [Open].
3. Connect the PC to the HMI
Connect your PC to the TOP unit using either an Ethernet or USB cable.
Connect your PC to the TOP unit using either an Ethernet or USB cable.
1) For Ethernet communication: Connect the Ethernet cable, and configure the IP settings on both the PC and the TOP unit.
2) For USB communication: Connect a USB cable to the mini/micro 5-pin port on the front of the TOP unit.
4. Build and Transfer the Project
Press F9 or go to [Trans] - [Full Build & Transfer].
- The "Build" process compiles the project and generates the transfer file (.HBZ).
- If the message "BUILD SUCCESS" appears at the bottom, the file is ready to be transferred.
- If you see "BUILD FAILURE", the transfer cannot proceed:
- Open the [Error & Warning] page, or
- Close the [Project Build Dialog] to view the error list at the bottom.
- Correct all listed errors before retrying.


5. Select the Connection Method (First-Time Only)
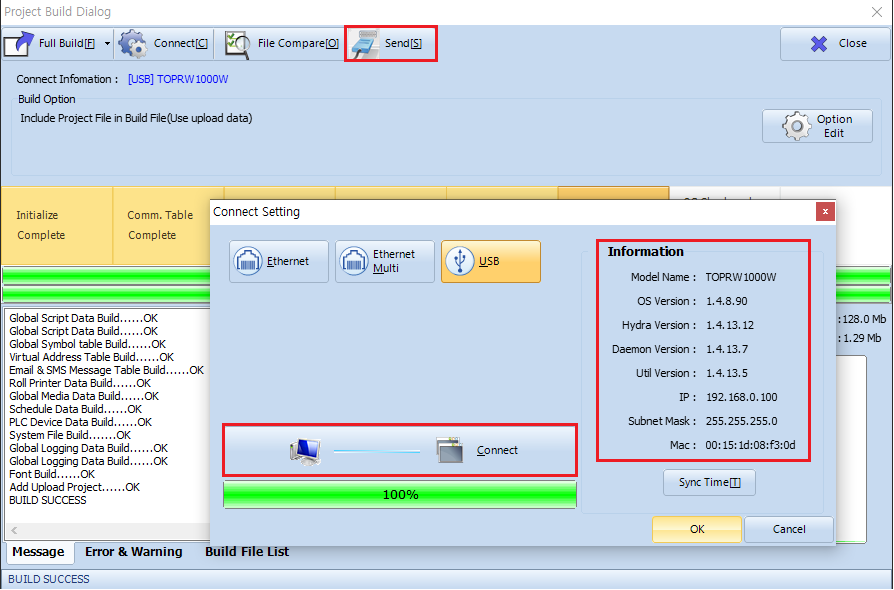
The first time you transfer a project, the [Connection Setting] window will appear.
1) For USB: Select USB and click Connect.
The first time you transfer a project, the [Connection Setting] window will appear.
1) For USB: Select USB and click Connect.
2) For Ethernet: Select the appropriate PC's IP (Bind IP) address and click Connect.
Once the connection is established, [Infomation] will be displayed. Click "OK" to continue.
From the second transfer onward, the system will remember your last-used connection method and apply it automatically.
Once the connection is established, [Infomation] will be displayed. Click "OK" to continue.
From the second transfer onward, the system will remember your last-used connection method and apply it automatically.
6. Start the Transfer
In the [Project Build Dialog] window, click the [Send] button at the top to begin.
- The existing project on the TOP device will be deleted and replaced with the new one.
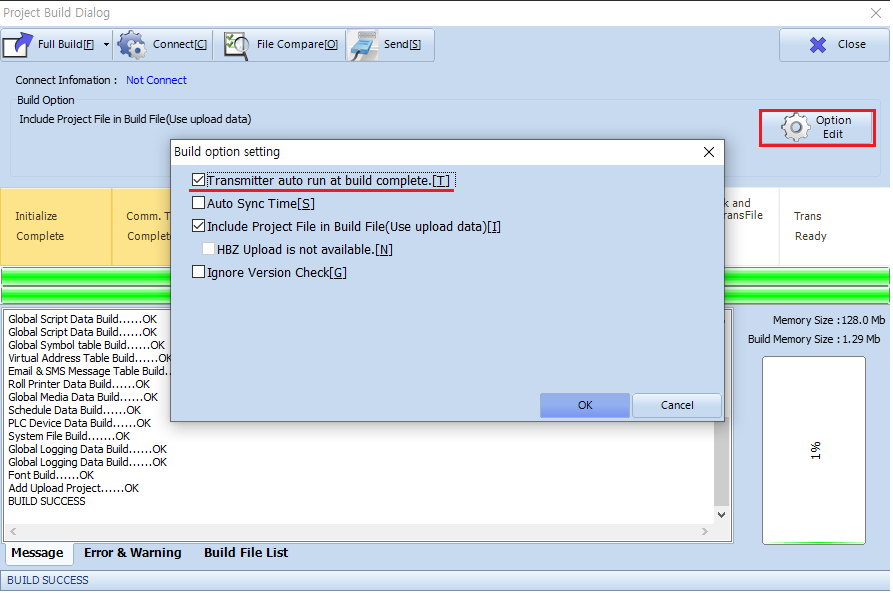
- To automatically launch the transfer after each build, enable [Transmitter auto run at build complete].
- After the transfer is complete, the TOP unit will automatically reboot.
7. Verify the Project on the HMI
After reboot, switch to Run Mode to view the project.
To have the HMI start directly in Run Mode when powered on:
- Go to [Control Panel] - [Project Setting].
- Set Start Mode to [Run].
After reboot, switch to Run Mode to view the project.
To have the HMI start directly in Run Mode when powered on:
- Go to [Control Panel] - [Project Setting].
- Set Start Mode to [Run].